Thursday, September 19, 2013

A Party for Your Mouth: Raspberry Chipotle Jam!

Fresh raspberries & dried chipotle peppers
End of summer brings the last of the berries.  Are raspberries still in season where you live?  Run, I say RUN to the farmer's market, the backyard or your favorite purveyor and procure a stash of raspberries!  Compared to strawberries, blackberries and blueberries, raspberries are more tart than sweet.  However, that tart flavor works to full effect in jam.  What could be better than Raspberry Jam, you ask?  Raspberry Chipotle Jam, which is essentially raspberry jam with a smokey kick.  Faint of heart (or taste bud) when it comes to spicy food?  Omit the chipotles.

Sounds yum, but I can't imagine a Raspberry Chipotle PB&J.  Well, of course not.  How about a baked Brie topped with Raspberry Chipotle Jam? Pour it over cream cheese and serve with crispy multi-grain crackers. Try it on cornbread.  Really.  Use it as a glaze on grilled chicken, pork or fish.  Put a dollop on a buttered biscuit or yeast roll.  Heat it just a little and drizzle it over dark chocolate almond ice cream.

What is a chipotle pepper, anyway?  Chipotle peppers are smoked jalapeƱos.  For this luscious jam, you may use chopped, rehydrated dried chipotle peppers or ground chipotle powder.  Check your local Latin grocery for chipotles and ground chipotle powder.  Badia makes a lovely chipotle powder; chipotle peppers may be hard to find.  I bought dried chipotles in bulk from Dekalb Farmers Market.  If you'd like to use dried whole chipotle peppers, follow the method described in my Ode to Spicy Sauces post.  If you want quick and easy, use ground chipotle powder.

How long is this going to take? That depends.  I can whip up a batch in about an hour, because I've done this A LOT.  If you are a newbie, allow yourself 2 hours.  It takes a while for that big old water bath canner full of water to heat.  Waiting around on things to boil takes the most time. A watched pot and all that...

Raspberry Chipotle Jam
Yield: 6 to 8 half-pint jars
6 cups raspberry puree, measured after pressing through a sieve or food mill to remove most of the seeds
3 dried chipotle peppers, rehydrated and finely diced, OR 3 tsp. ground chipotle powder
3 Tb. no- or low-sugar pectin (bulk equivalent to 1 box)
4 cups raw turbinado sugar

Supplies
Water bath canner or large stock pot with insert and lid
Canning jars, lids and bands
Canning accessory kit  (You need this.  Really.  You will save yourself painful burns and broken canning jars by making friends with this fact early in your canning career.  No, you cannot successfully use kitchen tongs as a jar lifter. Not even the rubberized ones.  I have scars).  The canning accessory kit contains:

  • Jar lifter
  • Canning funnel
  • Magnetic lid lifter
  • Headspace ruler

Dish towels or several layers of newspaper to protect the counter or tabletop from drips and hot jars
Sharpie or other permanent marker to label lids

Notes
*You will need approximately 4 pounds of raw berries for each batch of jam.  Discard any fuzzy or obviously bad fruit.  Don't ruin your batch, waste your time and effort by trying to be frugal.
*Chop rehydrated chipotles in a food processor or high powered blender.  Don't use your 25 year old Oster basic blender; you will burn the motor out.
*You may substitute 1 box of no- or low-sugar pectin for the 3 Tb. bulk, if you can find it.  Stores seem to have shifted to the Ball "flex batch" bulk packaging instead of the boxed Sure-Jell. Pricing on pectin varies widely, so do your due diligence.  As a rule, you will usually pay more for supplies at a grocery store.  Ace Hardware is a wonderful canning resource. Do NOT substitute regular or liquid pectin.  Each type of pectin requires a different method and different fruit to sugar ratios.  This is a low sugar recipe and will not set if you use regular or liquid pectin.
*White or brown sugar (light or dark) may be substituted for raw sugar and work equally as well.  Raw and brown sugars will add a hint of molasses, which enhances the flavor.

Method

  1. Put water bath canner on the stove.  Fill half-way with clean water.  If you have hard water in your area, add 1 c. white vinegar.  Cover and turn burner to high.  It will take a while to heat this much water.  If the canner begins to boil before you are ready to process the jars, turn the heat down to medium low.
  2. Wash canning jars, lids and bands in very hot, soapy water.  Rinse well.  Jars do not need to be sterilized because the jam will be processed 10 minutes in a boiling water bath.  See sterilizing canning jars.  You'll need to keep them warm to avoid shock breakage when you fill them with nearly boiling jam.  Put clean jars (one or two more than you think you'll need) in a 9x13 pan.  Pour 1 inch of water into pan, surrounding the jars.  Place pan with jars in the oven and set for 225 degrees.  Leave the jars in the hot oven until you are ready to use them.
  3. Place lids (one or two more than you think you'll need) in a small pot.  Fill with clean water so that all lids are submerged.  Place lid on pot, put pot on stove and set burner to low/ simmer.  
  4. Rinse and sort berries.  Discard any molded or spoiled fruit.
  5. Puree berries.  If you do not have a blender, you may crush the berries using a potato masher or pastry blender.

  6. Process puree with a food mill or press the puree through a sieve to remove most of the seeds.  Raspberry seeds are tiny and it is difficult to make a truly seedless raspberry jam.

  7. Measure 6 cups of seedless puree for jam.  Reserve any extra for other purposes or next batch. (Pureed, strained raspberry puree may be frozen for future use.  Be sure to label your container. Raspberry puree is hard to distinguish from strawberry puree when frozen).

  8. Whisk in chopped, rehydrated chipotles or 3 tsp. chipotle powder.
     
  9. Bring raspberry mixture to a boil. 
  10. While you are waiting for the raspberry mixture to boil, measure sugar into a small bowl and set aside.
    4 cups raw Turbinado sugar
  11. Once raspberry mixture has begun a gentle boil, whisk in 3 Tb. no- or low-sugar pectin.  Stir until dissolved and return to a boil.
  12. Add in sugar, all at once, whisking to incorporate and dissolve sugar.  Turn heat up to medium high and stir frequently.
  13. When mixture reaches a hard boil that cannot be stirred down, boil for 1 minute.
    Hard boil stage
  14. Turn off heat.  
  15. Skim foam, if necessary.  Foam is delicious, but doesn't look pretty in jars of jam.  Let it cool a bit and then sample to see what your jam will taste like when finished.
  16. Place canning funnel in jar.  Use a 1 cup measure to fill jars.  Fill up to what appears to be the rim.  When you remove the funnel, the jam level will go down a bit.
  17. Fill all jars as quickly as possible.  Jam will seem very liquid at this stage, but will firm after processing and cooling.  
  18. Remove air bubbles in jam by stirring gently around the perimeter.  A clean chopstick works well.
  19. Wipe rims of jars with a moistened paper towel or clean dish towel.  Any jam residue left on the rims will prevent jars from sealing, so don't skip this step.
  20. Using magnetic lid lifter, remove lids from simmering water and lightly place on filled jars.  Gently place rings over lids, aligning with threads on jar, and screw down to resistance (fingertip tight) but not more.
  21. Using the jar lifter, place jars into canner.  Close lid.  Turn up heat to medium high.  Start timing from a gentle boil.
    Filled jars in the canner
  22. Process jars 10 minutes.  Turn off heat and remove lid.  Allow jars to rest in canner for 5 minutes.  Using the jar lifter, remove jars to a counter or table covered in dish towels to absorb any drips and protect the surface from heat.
  23. You should hear a "popping" sound that indicates the jars are sealing.  Allow jars to cool for 24 hours without moving.  Check seals; any jar lids that make a "clicking" sound when you press down on them are not sealed.  Refrigerate and enjoy now, or reprocess.
  24. To reprocess unsealed jars, remove lids and bands, wipe down rims and inspect for cracks or nicks.  If jar rim has an imperfection, put jam into another jar.  If no imperfections are found, wipe rim and replace old lid (you can't use it again) with a new, heated lid, replace bad and reprocess in the water bath canner the same way you did originally.
  25. Remove bands from sealed jars.  Wash in hot, soapy water to remove any residue.  Bugs love residue.  Don't skip this step.
  26. Label jar lids and store jam in a cool, dark place.

   You did it!  Congratulations.  I hope the process was empowering.  Be sure to tell me what you think!

Blessings,
Wyndy

Helpful Links
Sterilizing canning jars
How to use a water bath canner
National Center for Home Food Preparation

Sunday, September 8, 2013

Make Ahead Spicy Cheddar Biscuits

Spicy Cheddar Biscuits
I love the tradition of Sunday Dinner.  In the South, this is the large meal most typically served in the early afternoon after Sunday morning church services.  Sunday dinner ties us to generations past, to a slower time before the advent of MCL Cafeteria and Zaxby's Chicken.  When I was a girl, we would eat Sunday Dinner on holidays and special occasions at MeeMaw Esther's house on St. Petersburg Beach.  I associate her with ham, green beans, corn, fruit salad, rolls and cherry pie, all from scratch.  Whether this is true memory or a figment of my fertile imagination, the feelings evoked by the image of my family around her table are real.  We held hands while Daddy asked God's blessings on the food and the hands that prepared it. I remember being very grateful, but this was probably due to the fact that my breakfast had certainly worn off somewhere in the middle of the preacher preaching and at least an hour and a half or so elapsing before we were praying over the feast.

Sunday Dinner is a comfort, both the food that is served and the ritual of preparing it.  Sometimes I struggle to plan a menu that will be on the table before anyone passes out of low blood sugar.  This past Saturday night presented one of those planning challenges.  I intended to serve roast beef cooked with baby carrots; garlic mashed red potatoes and gravy; fresh green beans, squash casserole, and yeast rolls.  Preparations were moving right along...roast seasoned and marinated.  Squash cooked with purple onion and mixed up into a classic casserole topped with buttery Ritz cracker crumbs, ready to bake.  Green beans cooked.  It was a little after 10PM when I realized that I didn't have time to make the yeast rolls before bed.  CRISIS!  Sunday Dinner is the one meal at which I try serve some sort of from-scratch bread.  What to do?  What to do?

Given the menu, I thought that a cheese biscuit similar to the ones served at Red Lobster might fit the bill.  I googled for copy cat recipes and found several with good ratings, but that were made with Bisquick.  Well, ladies and gentlemen, I don't *do* Bisquick.  I will spare you my rant on trans fat.  You're welcome.

I also wanted a biscuit that could be prepared ahead and baked right before serving.  Flash freezing suited the bill, just as long as the recipe was adaptable.  After a cursory search on EpicuriousBon Appetit and All Recipes, I modified a recipe from my Ultimate Southern Living Cookbook ©1999.  The original recipe is entitled Hot Cheese Drop Biscuits (pg. 64).  I'm sure it's fine as written (except for the trans fat previously discussed), but I enjoy changing things up a bit.  I can't help it.

My Spicy Cheddar Biscuits use butter rather than shortening.  I use a mixture of all purpose and whole wheat flour, more baking powder and a different proportion of cheese and buttermilk.  Best of all, you mix everything in a food processor and freeze them so that you may pop one (or all 18) in the oven as you need them. 

ingredients
Spicy Cheddar Biscuits
1 cup unbleached AP flour
1 cup white whole wheat flour
1 TB. baking powder
1/2 tsp. cayenne pepper
1/2 tsp. sea salt
1 1/2 cups shredded sharp cheddar
4 TB (1/2 stick) butter
1 cup plus 1 TB buttermilk

Note:  If you use 2 cups AP flour, you'll only need 1 cup buttermilk.  If your family likes things less spicy, reduce the amount of cayenne to 1/4 tsp.


Method


dry ingredients


Measure dry ingredients and put in food processor fitted with a metal blade.


cold butter works best


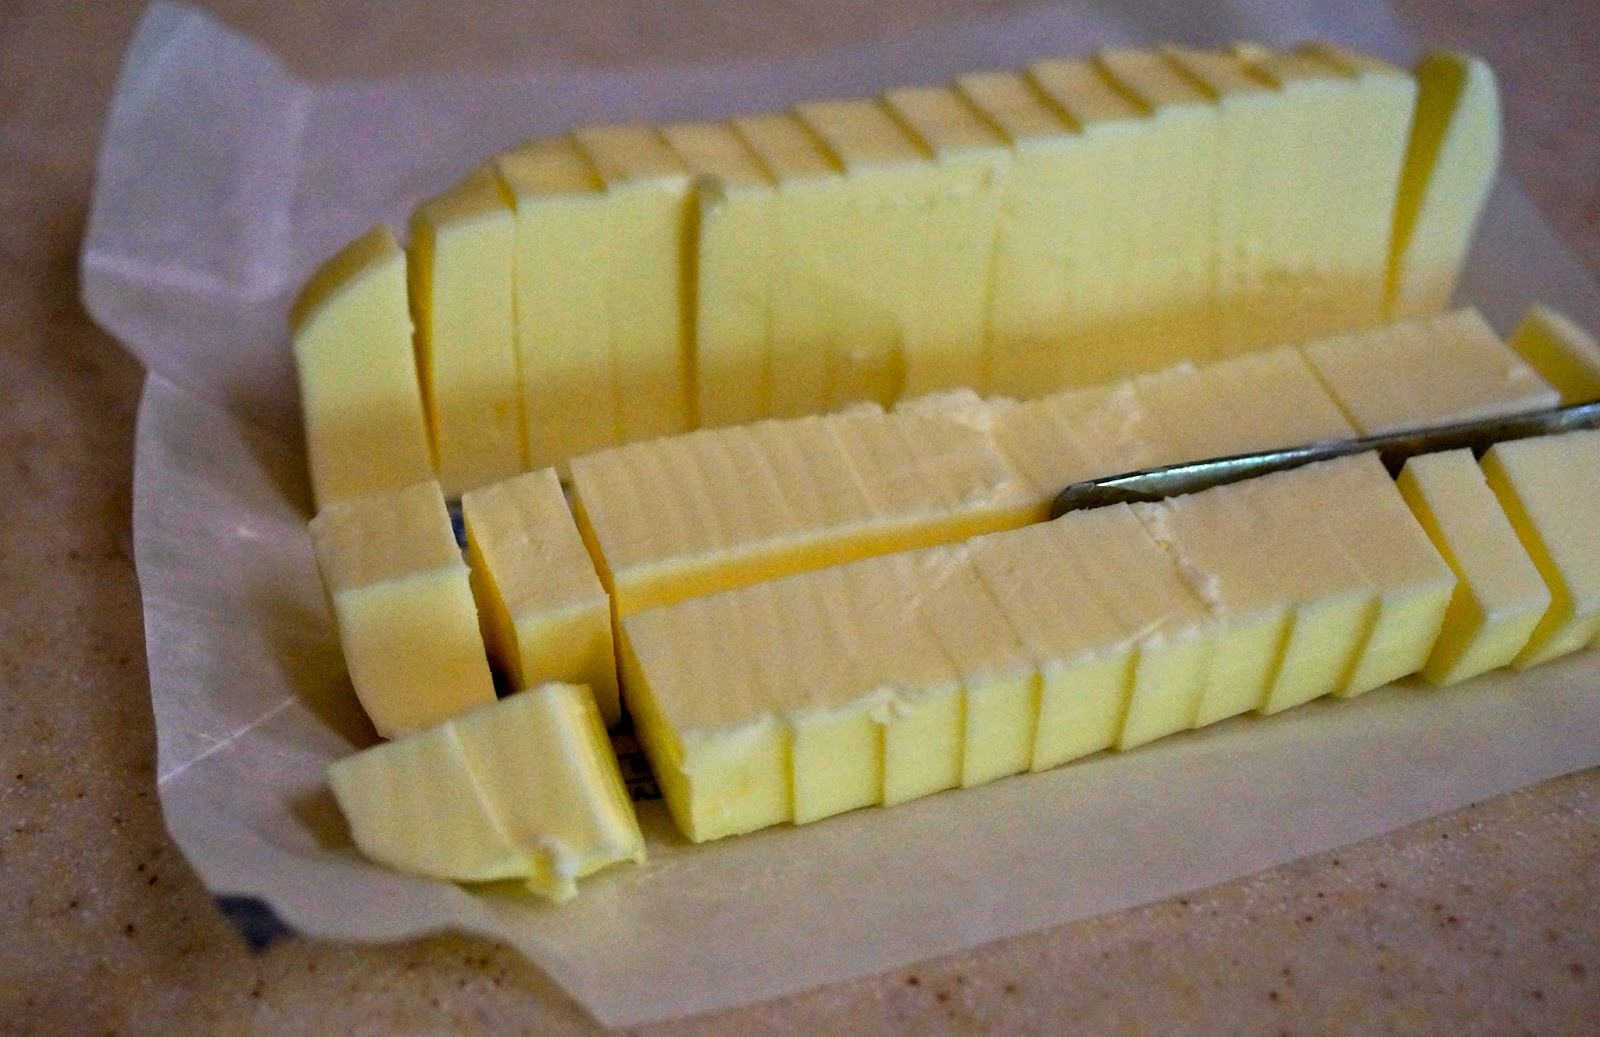
Cut butter into pats; then cut in half again lengthwise.


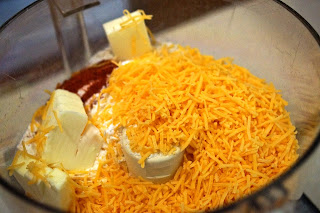
Add cheese and butter to dry ingredients. Place lid on processor and process in short bursts, 6 to 8 times.  Check mixture.


When the butter and cheese have been cut in properly, the mixture will resemble course meal.


Add in the buttermilk.  


process just until dough clings together


Close lid on food processor and process in short bursts just until the dough clings together and forms a rough ball.  Do NOT over process or dough will be tough.


Using a TB sized cookie dough scoop, drop heaping scoops of dough into a muffin tin.  Don't try to make the dough balls perfectly round; they will look better a little craggy.


dough balls ready for a flash freeze

Once the dough has been distributed among the muffin tin compartments, place tin in the freezer.  (Yes, I  know this freezer needs to be defrosted.  I don't defrost until I can no longer fit food in the freezer.  Go ahead, judge.  I won't lose one moment's sleep over it).


frozen balls of biscuit dough

After the dough has frozen solid (a few hours or overnight if you've embarked on this project at 10:30 PM like I did), remove it from the freezer.  Using a butter knife or other sturdy, non-sharp tool that may be used as a lever, pry/pop/dislodge the biscuit dough balls from the muffin tin.  Put them in a gallon sized freezer Ziploc labeled for content and with baking directions. Label the bag.  Please.  You won't remember what this is or how to bake it a month from now.  Cookie dough and drop biscuits look uncannily similar when frozen. 


Return the Ziploc baggie full of delightful cheesy biscuits to your freezer to use later.


To bake, remove the desired number of biscuits from the freezer.  Place them about 1 inch apart on a baking sheet covered with parchment paper.  Let them thaw 5 minutes or so while the oven preheats to 425.  Bake for 9 to 12 minutes, until golden brown. Reminder:  All ovens bake differently.  Adjust bake time and temperature accordingly. 

If you'd like to bake the biscuits immediately after preparing the dough, bake at 425 for 7 to 9 minutes, or until biscuits are dry set and golden brown.

My son said these biscuits tasted like Tabasco Cheezits.  Winning!  :-)   I think they would be wonderful with Chicken Velvet or Loaded Baked Potato Soup. Omit the cayenne to serve with chili.  Enjoy, and let me know how they work out for you.

Blessings,
Wyndy

Spicy Cheddar Biscuits

Sourcing
China: Johnson Bros Old Britain Castles
Food processor: Cuisinart
Cookie dough scoop: Pampered Chef
Muffin tin: Doughmakers

Friday, September 6, 2013

Spiced Pumpkin Scones: A Taste of Fall

Spiced Pumpkin Scones & English Tea
Ah, September!  Never mind that you are potentially the hottest month of the year in Atlanta, Starbucks seems to believe that it is now officially fall (if their pumpkin themed menu is to be believed).  From the delighted FB posts of my friends, I have concluded that pumpkin spice lattes and cream cheese filled pumpkin muffins and pumpkin scones and pumpkin bread must be akin to Nirvana (the experience of transcendent bliss, not the musical group).

Okay, I can dig it.  I love spiced pastries and baked goods as much as the next person.  I will admit to trotting out the Caramel Apple Cupcakes at a recent gathering on September 1st, the very first day that that such a fall treat might be acceptable.

I love fall.  It is my favorite season.  The brilliant blue skies, stark white clouds and changing leaves make me feel all warm and fuzzy inside.  When I was asked to make pumpkin scones for an upcoming wedding, I was a bit intimidated.  I love making scones, but pumpkin?  With all the Starbucks whooplah, that's a tough act to follow.  What if they aren't good?  Or aren't pretty?  Or, worse, just taste awful?  Anxiety...

Time for the test kitchen.  Although I was given a "tried and true" recipe by the Mother of the Bride, I can't resist tweaking recipes to suit my fancy.  So here it is: My Spiced Pumpkin Scone Fancy.


Spiced Pumpkin Scones

Scones:
1 3/4 c. AP (all-purpose) unbleached flour
1/4 c. milled flax seed
7 Tb. raw Turbinado sugar
1 Tb. baking powder
1/2 tsp. sea salt
1/2 tsp. ground cinnamon
1/2 tsp. ground cloves
1/2 tsp. ground nutmeg
1/4 tsp. ground ginger
6 Tb. frozen butter
1/2 c. chilled canned pumpkin
3 Tb. heavy cream
1 large egg, cold

Glaze:
1 c. powdered confectioner's sugar
1/2 tsp. ground cinnamon
1/2 tsp. pure vanilla extract
1/4 c. heavy cream

Directions

One of the keys to making scones is making sure the butter is cold...really cold.  You will need to work quickly to keep all the ingredients as cold as possible.  Remember: cold is key.


1. Prepare the butter for freezing.  First, unwrap the stick of butter.  Slice the stick of butter into pats, cutting across the width of the butter.


After you've sliced the butter into pats, cut the stick in half lengthwise; then again lengthwise on each longitudinal half of the stick.  Each pat should now be in quarters.


Flip the butter pieces into a bowl and put the bowl in the freezer until you are ready to mix the dough.


2.  Measure out the dry ingredients: flour, milled flax seed, raw sugar, baking powder, ground cinnamon, ground cloves, ground nutmeg, ground ginger and sea salt.


Put dry ingredients into your food processor and process about 15 seconds or so to mix the ingredients and chop the raw sugar into smaller pieces.


3.  Prepare the wet ingredients.  We aren't ready to add them to the dry ingredients yet, but we want them ready and chilling, literally, until the proper time.  You've already prepared the butter, and it should be in the freezer awaiting your pleasure. Measure out the chilled, canned pumpkin and put it back in the refrigerator.


egg & cream


Crack the cold egg into a small bowl; add the cream and whisk until incorporated.  Put the egg and cream mixture back in the refrigerator until you are ready to mix the dough.


4.  Prepare your work area.  Get everything ready while the cold ingredients are waiting in the fridge.  Don't be lazy and leave them out; it matters.  You will need a lightly floured surface upon which to roll out the dough, a rolling pin and a baking sheet covered in parchment paper.  Leave the flour out, as you'll need a little to sprinkle on the top of the scone dough to keep it from sticking to the rolling pin.


5.  Ready, Set, GO GET THE BUTTER!  Put the frozen butter into your food processor with the dry ingredients.


dry ingredients and cut-in butter


Affix the lid and process about 10 to 15 seconds.  Check.  If there are large chunks, process in short bursts until the mixture looks like course meal.


adding pumpkin, egg and cream


Retrieve the pumpkin, egg and cream from the fridge and add them to the processor.


process just until dough clings together


7.  Process in short bursts, about 12 to 15 or so.  Stop when dough seems to cling together in clumps.  Do NOT over mix the dough!  Less is better.


quickly shape the dough into a ball


8.  Squish the dough together using your hands as little as possible.  They are warm and will heat up the dough.  Use a spatula to remove all dough from processor.  Shape into a ball on the floured surface.


8 x 6 inch rectangle, 3/4 inch thick


9.  Shape the dough into a rough rectangle, about 8x6 and 3/4 inch thick.  Try to even up the sides, but touch the dough as little as possible with your hot little hands. (Hot hands melt butter).


10.  Use a dough scraper, knife or whatever your heart desires to cut the scones into the shape of your choosing.  I prefer squares, as my triangles look like they were cut out by a drunken sailor.  Biscuit cutters work well, too.


ready to bake
Use a chilled, floured blade to cut the scones.  Using firm pressure, cut directly down into the dough and bring the blade straight back up without twisting.  This will (allegedly) help the scones rise properly.  Place cut scones about an inch apart on a baking sheet covered with parchment paper.

Scones tend to spread out, so you'll want to give them some room.  I've "sealed the edges" with flour on these, based on some internet advice I read about how to prevent scones from spreading out into an ugly heap.  The jury is out on whether or not I think it actually works. Let me know how it works out in your kitchen.

pumpkin scones, fresh from the oven

11.  Bake the scones in a 425 degree oven for 14 to 16 minutes, or whatever works for you.  All ovens are different, so make adjustments for your particular oven's quirkiness.  Remember to lower the temp by 25 degrees if you are baking on a dark pan.  Increase the bake time if you are using a baking stone or glass pan.  Scones are done when they look set and are just starting to brown.

Allow scones to come to room temperature before icing.  If you glaze them while they are warm, the icing will melt.  This may not be a bad thing if you are going to eat them immediately, but they won't be as pretty if you plan to serve them later.
pure vanilla, ground cinnamon, cream, confectioner's sugar


12.  For the icing, you will need confectioner's sugar, ground cinnamon, pure vanilla and heavy cream.  Add the cream to dry ingredients one tablespoon at a time, whisking after each addition.


whisk icing until smooth


Once the glaze is a thick yet spreadable consistency, whisk until smooth.  Transfer to a pastry bag fitted with a round tip and glaze scones.


cut off 1/2 inch tip of bag corner


In lieu of a pastry bag, I prefer to use a Ziploc freezer bag, as they are disposable.  To use a Ziploc as a pastry bag, cut 1/2 inch off of one corner of a quart sized freezer Ziploc bag.


insert coupler inside Ziploc


Put a frosting tip coupler into the ziploc, pressing it into the inside of the cutout corner.


cap with metal tip; screw on band to secure


Place a round tip over the outside of the bag and coupler tip; secure it by screwing the ring band over the top of the metal tip and onto the threads of the coupler, over the top of the Ziploc bag.


use cup to stabilize Ziploc for filling


Once the pastry tip has been fitted, put the bag down in a larger cup to support the bag while you fill it with icing.  Fold the bag over the edges of the cup to fill more easily.


poor man's pastry bag, ready to use


After all of the icing has been scraped into the bag, remove the Ziploc from the cup and twist the bag top down to compress the icing toward the tip.  Don't seal the bag, or you may have an icing explosion. :-)


iced scones


Squeeze the bag to dispense the glaze, drizzling it over each scone. Allow to dry before touching or you may disturb the sweet, cinnamon-laced goodness.


afternoon tea or midmorning snack


TAAAA DAAAA!  Spiced Pumpkin Scones.  And you didn't have to go to Starbucks to get one.  Enjoy, and please let me know how they worked for you.

Blessings,
Wyndy
Sourcing
Linens: Longaberger
China: Johnson Bros Harvest Time
Ceramic pumpkin: Hobby Lobby
Food processor:  Cuisinart
Baking sheet: Doughmakers
Herb nippers: Pampered Chef
Dough scraper: Dexter Russell
Parchment paper, vanilla, bulk spices: Costco
Pastry tip and coupler: Wilton